


A Comprehensive Guide To Global Entry – Part 2
Guide to Global Entry Part 1 – Introduction To The Program
Guide to Global Entry Part 2 – The Application Process
Guide to Global Entry Part 3 – The Interview & Beyond
The Global Entry Application Process
This is the second part of our guide to Global Entry. In the first part we discussed the benefits of Global Entry & who qualifies. This part will explain and detail the application process including what information is needed when you apply.
Information Needed
Before I walk you through the application, here is a list of all of the information that you will need to complete the process. I have listed it here in the order it is asked for on the application.
- Full name (including past names used), height, weight & eye color.
- Date and place of birth.
- Contact information including an email address and telephone number.
- Citizenship Document (Passport, Naturalization Certificate, Citizenship Card, Birth Certificate).
- All addresses that you have resided at during the past five years.
- Driver’s License information. (If you have one.)
- Current employment status and a five year work history.
- A list of all the countries you have visited during the past five years.
Registering With GOES
After you have decided that you are ready to apply for Global Entry, it is time to fill out the rather daunting application. To start you must visit the Global Online Enrollment System or GOES. When you reach the main page, you must first register for a new account before starting the application.

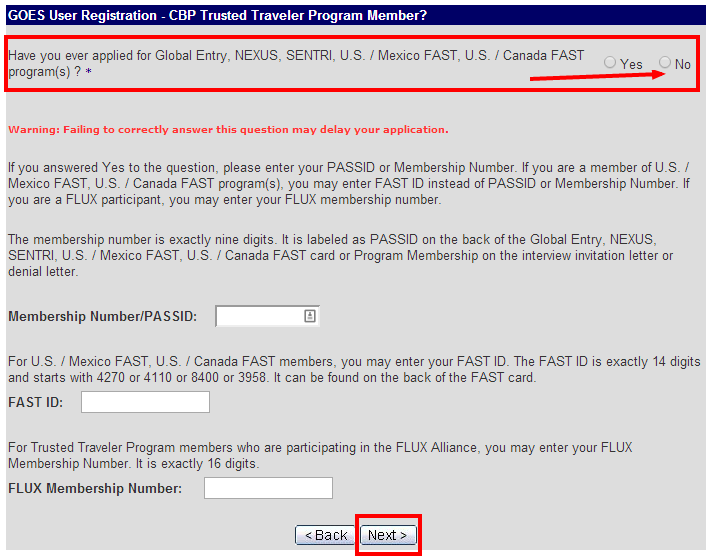
The first screen that will come up after clicking the register button warns that having multiple GOES accounts is a violation and may result in your application being denied. Click next here and you will be brought to a rather confusing screen with a lot of blank text boxes.
This screen is asking whether or not you have previously enrolled in NEXUS, SENTRI or another similar program. If you haven’t, simply fill in the “no” bubble and click next.
The next screen is simple enough. Fill out your name, address, date of birth and the other requested information. While it is a slight pain to do this before even filling out the application, they do autofill this information later. When done click “Next”.
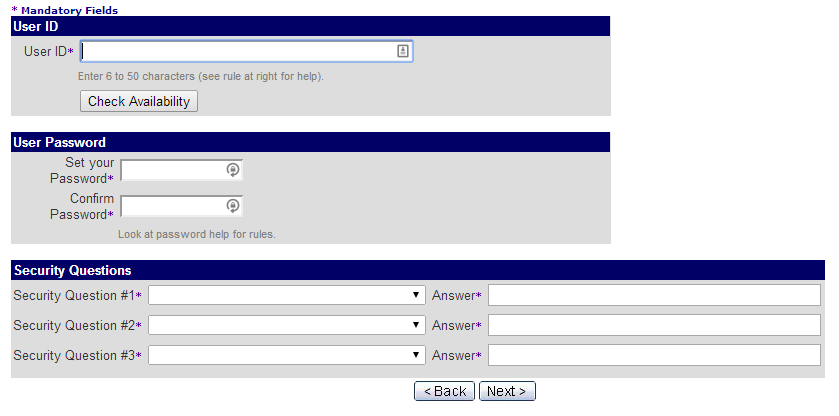
The final part of the registration process is choosing your User ID & password. The password requirements aren’t posted very clearly and they do have quite a few rules. From what I can tell, the password can’t contain either your first or last name, it must be at least 8 characters long and must contain a letter, number & a special character. You will also be asked to answer three security questions. When this is completed click “Next”.
At this point you are brought to a screen where your new User ID is displayed. Click the “login” button and you will be brought back to the main page.

The Application
Since most of the application information is pretty self-explanatory, I will not show you every single screen. I will instead focus on the areas of the application that are a little more complicated.
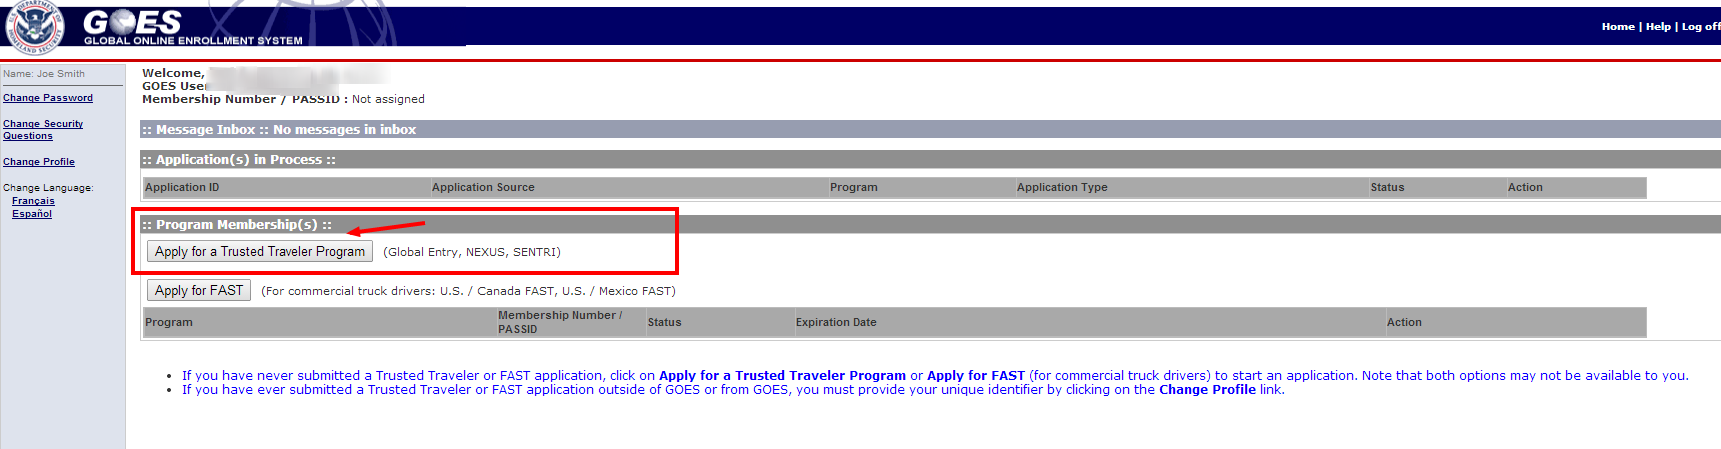
After logging in from the main page, the first screen displays a warning about unauthorized use. Just click “Enter” and you will come to your account home screen. At this point you should see a button that says “Apply for a Trusted Traveler Program”.
This first section of the application asks for your basic information. You will notice that your name and date of birth have been filled in. You must still include your height, eye color & gender. When this is complete click “Next”.
The next few screens will inquire about whether you have ever used another name, where you heard about the program and for the details and place of your birth. Fill in all of that information and click “Next” to go from screen to screen.
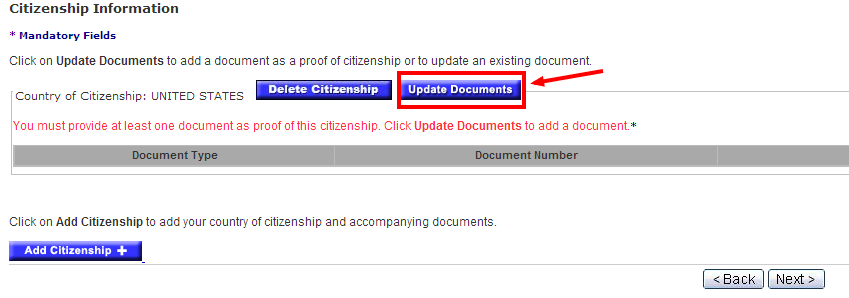
Eventually you will reach a page called Citizenship Information. This gets a little complicated, because there is a button titled “Add Citizenship”. You don’t want to click that, but instead click “Update Documents”. You will then see a dropdown where you can choose which document that you will be using to prove your citizenship. From the dropdown, select the document you want and then click “Add Document”.

You will now be at a screen asking for all of the information about your document. For example, if using a Passport, you will be asked the issue & expiration dates, country of issue & your full name as it appears on the document. When this has been completed click “Next”.
The next screen is Admissibility Documents. If you have already added your Passport in the Citizenship area then you can just select it here. You do not have to provide an additional document in this section. When this is completed click “Next”.
From here the rest of the application is pretty straightforward. You will be asked about for your Driver’s License info if applicable. Additionally they will ask about your primary residence, employment status & employment history for five years and whether or not you have been convicted of a crime in the U.S. or another country.
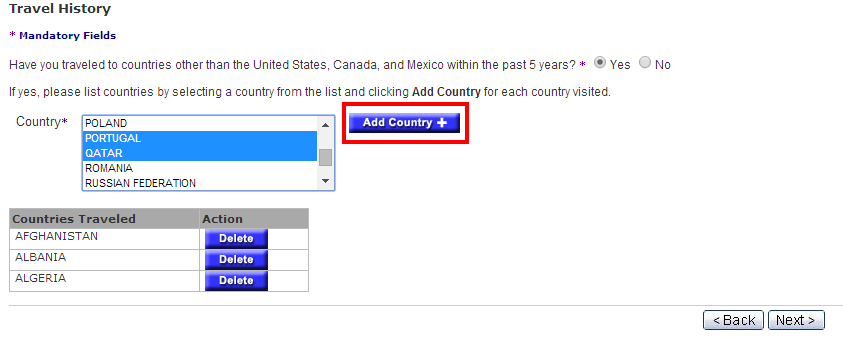
The final section not yet mentioned is your travel history. In this section you are asked to list every country you have visited in the past five years. There is a list of every country and you simply highlight the countries you have visited and then click “Add Country”. Note that you can select more than one at a time by using the shift key. Once you click “Add Country” the highlighted countries are added to the list below. You can continue to add more countries until you are done.
Once the application is complete, you will be taken to a review page where you can see all of the information that you have provided on one page. Make sure that it is correct and then submit the application.
After The Application
Once the application is submitted, you will be taken to a confirmation page. It tells you to check back after a few days to see if you have been approved, but as long as you have provided an email address, the system will email you to let you know when the application status has changed. It took three days for my application to be conditionally approved.
Conclusion
Click below for the final part which describes how to login and schedule the in-person interview, what questions they will ask at the interview and how long the final approval process takes.

[…] have Global Entry and I think it is a very valuable service. I wrote a complete guide to the application and interview process last year if you are interested. (The process for an infant is IDENTICAL to […]
[…] Part 2 – The Application Process […]